
Butt Welding of pressure pipes – what now? ?
Always follow the pipe supplier’s instructions.
Do you first clear what brand – dimension and type of pipes to be welded .
Make sure you have pipes manufacturer butt instructions.
Check that the tube has been stored correctly according to the pipe manufacturer, with respect to ovalietet, scratches, clamping m. m.
Follow pipe manufacturer’s instructions for trench, stuffing material, compression, covering o.s.v.
Follow the Labour Inspection instructions for work in trench.
Check that your machine can weld the desired dimensions. I set any appropriate reductions in the jaws for pipes.
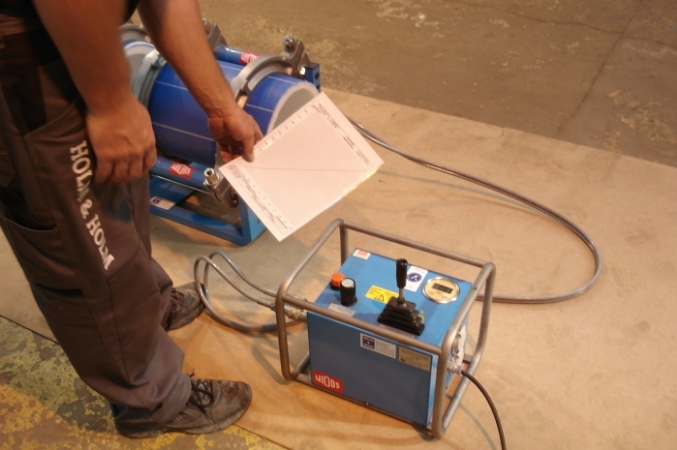
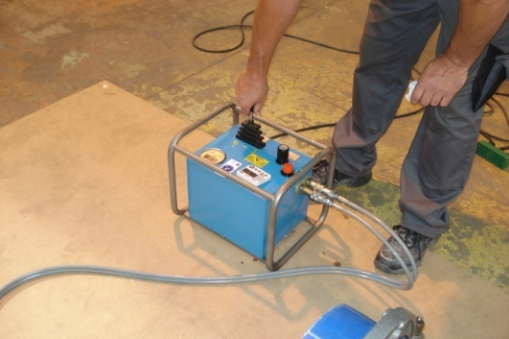
On the machine there must be a calibration report (pressure characteristic) which re-sets the machine’s display of pressure in bar for Newton . The report shall not be more than 1 years old ,and you must make sure that the machine number on the sled and number of hydraulic station are consistent with those on the pressure characteristic.
Should remove weld beads , prepare bead removing equipment to the dimensions.
Use welding tent / welding parasol by rain and the like.
Used generator Butt welding, the continuous power be large enough to machine usage.
The Teflon coated surface of the welding mirror (heating plate) must be clean and pure .
Turn on the welding mirror and set it on the temperature reported in pipe manufacturer butt instruction.
Check surface temperature with an external thermometer, at the start of each welding.
Note : The mirror temperature setting is only, it is the external thermometer in force..
If the machine has been stored for long, spares the seals the piston rods get a hint with VD40 or similar before driving the carriage.
On some brands tube with protection cap, require the manufacturer to remove the jacket in the welding area. always use Peeler for PE protective jacket pipes ; never knife .
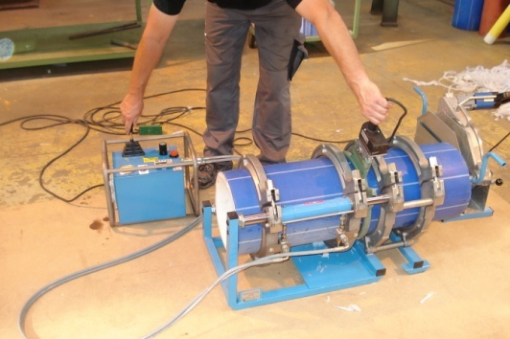
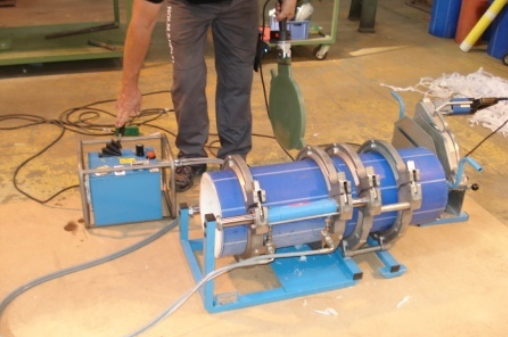
Clamp the tube in the sled with one overhang in center, and still room for planer. Turn the label facing up. Label near the welding point scraped. Pipe Clamp as the minimum of displacement is obtained.
For longer pipe clamped in the movable side pipe must be placed on Pipeline Rollers so the tube can be moved freely during welding. Never use wooden blocks or similar instead of roll bending, since the friction will be highly volatile, providing improper welding pressure. Let protective caps on the free end of the tube to be.

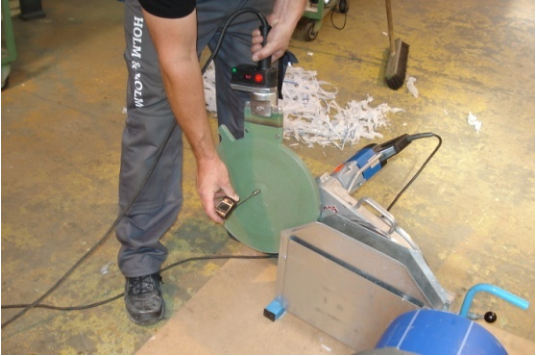
Insert planer. Never have hands in the area with the rotating parts / sharp knives.
Turn on the planer.
Some larger filings are 380 V, direction of rotation is controlled, possibly swapped a stage in connector.
Drive tube toward the rotary planer with a pressure large enough to take the chip to the both sides, but never so large that plane engine sounds strained.
Run the pipes from the still rotating planer.
Turn off the plane and set it in the holder.
Make sure the pipes are properly planed, otherwise repeat.
If planer not make cuts: Blades must be sharp , Otherwise, they must be turned or changed. Knives must have a height of about. 0,2 mm. over plan, you can use fine lines of paper under the knife.
Remove chips from welding area.
(Remove them also from nature, from the PE chips are commonly flammable waste. )
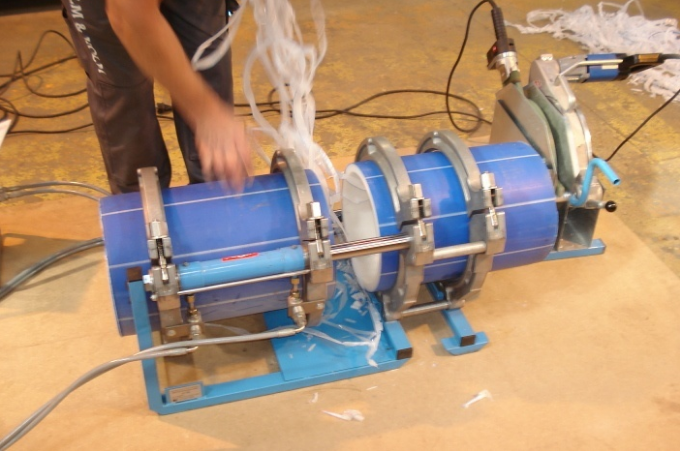
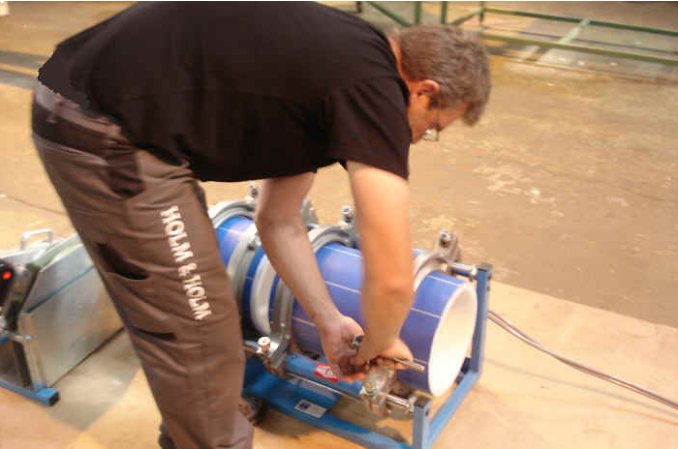
Run the pipes against each other and check edge shift, and that the tubes are flat against each other.
Edge-displacement can be reduced by loosening / tightening chucks and rotating tube.
After changing the set-repeated planing.
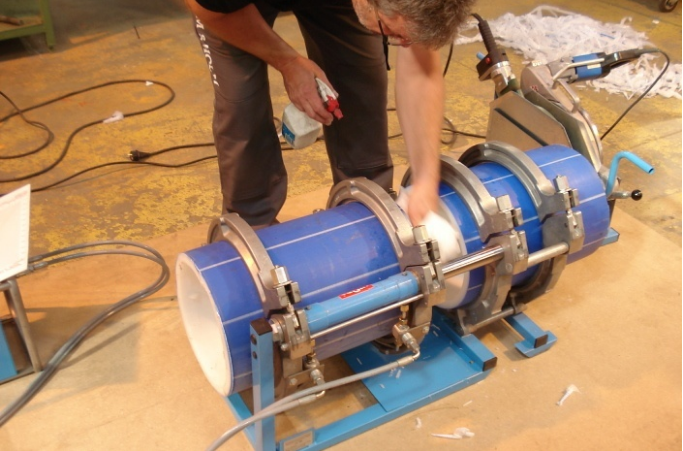
Clean the pipe ends with rubbing alcohol and paper towel or cleaning wipes .
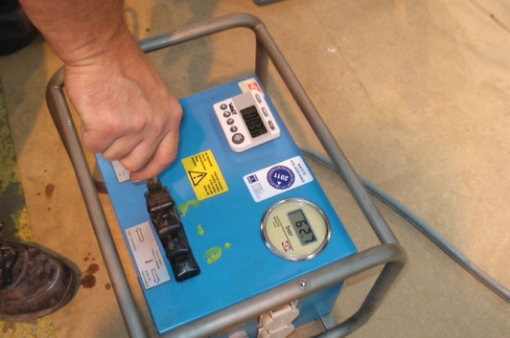
Find drag pressure (machine display in the Bar when it barely can move the tube).
Pre-set welding pressure manometer ( welding force in Newton from the butt instruction translated into Bar by pressure characteristic + drag pressure ).
Check the temperature of the mirror
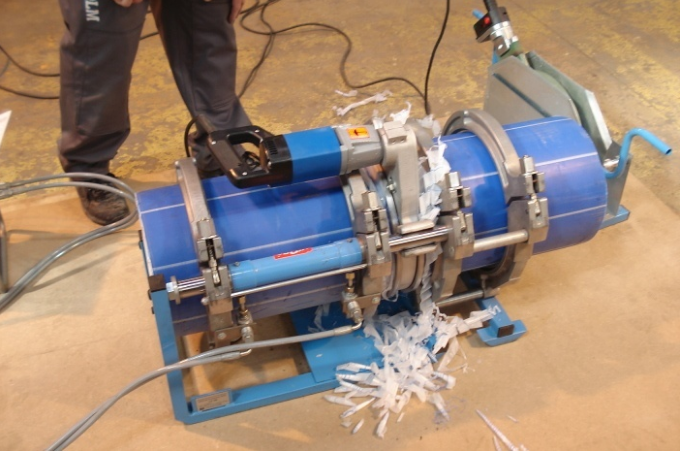
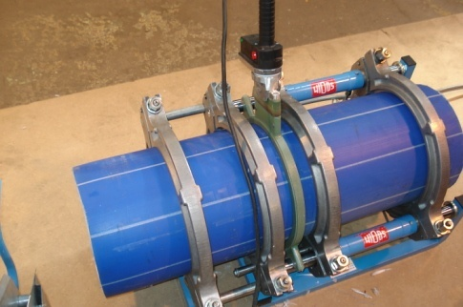
I set mirror and run the pipe ends against the mirror with pre-set welding pressure, before developing a bead on mirror, as shown in the butt instructions.
Once built a bead on the mirror as indicated in the butt instruction, put in depressurised.
When the Heating Stage has ended tube run from one another, mirror removed and pipes run along with the pre-set welding pressure. Operation lever is held in minimum 20 seconds (pressure build-up).
Conversion time by the weld should be as short as possible and not longer than specified in the butt instruction.
With marker pen printed date, time, machine and welder’s initials.

Fully welding pressure maintained throughout the cooling time specified in the butt directions.
Should the inner and / or outer bead removed after butt welding, done the easiest in the cooling time , while the tube is still in the machine and welding is” hand-warm”.
Butt Welding has the same strength even if beads are removed.
At the end of cooling time, relieve the machine to depressurised (0 bar), after which the jaws can be opened and you are ready for the next welding.
Welding of the fittings
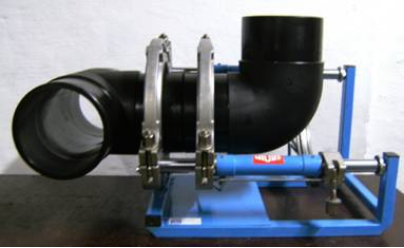
On WIDOS machines and HÜRNER machines up to 355 mm. the left base tray can easily be removed by loosening 3 screws, which allows you to create complex welds (T-pieces, etc.)
What tool box should contain.
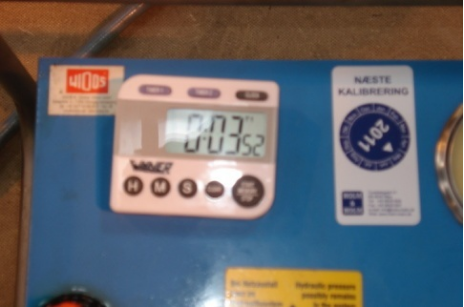
Thermometer
stopwatch
Key chucks.
Key reductions.
Key appropriate for knives on the planer.
Before you put the equipment in place for the next user.
machine cleaned.
The piston rods to slide wiped over with thin layer of acid-free oil
Blades must be sharp.
All cables and hoses must be whole.
Teflon (coatning) the mirror must be intact and “drop” well.
The machine should be dry.